
Gold Tees
Rating - 75.3 Slope - 142
Blue Tees
Rating - 73.2 Slope - 137
Front Nine Total
3657 / 3428 / 3094 / 2664 YARDS
White Tees
Rating - 70.4 Slope - 131
Green Tees
Rating - 71.7 Slope - 129
Back Nine Total
3550 / 3344 / 3053 / 2660 YARDS
Course Total
7207 / 6772 / 6147 / 5324 YARDS
-
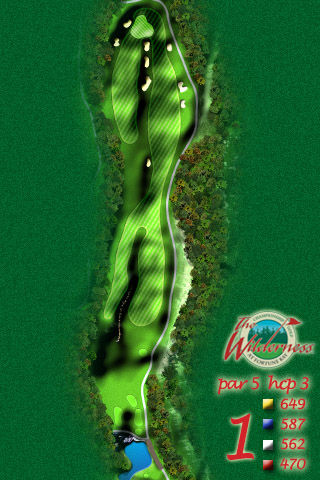
Hole #1
The White Pine
Par 5
649 / 587 / 562 / 470 YARDSThe Wilderness at Fortune Bay starts off with a long par five. The elevated tees are surrounded by majestic white and red pines. From the tees you have a stunning view of the exposed ledge rock that divides an upper and lower fairway. Wildlife abounds in this area of the course. There is an active osprey nest and a chance to see eagles in the vicinity.
-
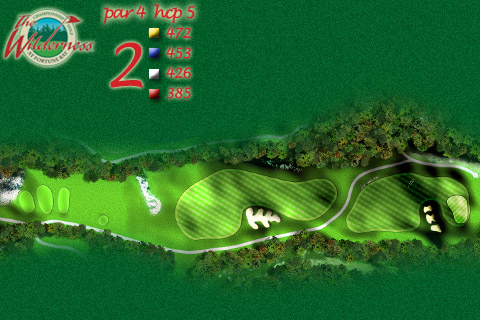
Hole #2
The Pine Marten
Par 4
472 / 453 / 426 / 385 YARDSHole #2, is a long, difficult, and beautiful par four. The tees are located atop a granite ridge, and the fairway opens out below the tees offering a beautiful view to the green. A large white ledgerock outcropping defines the left side of the fairway. This hole is lined by an abundance of cedars and spruce, which provide a definitive “Northwood’s feel”.
-
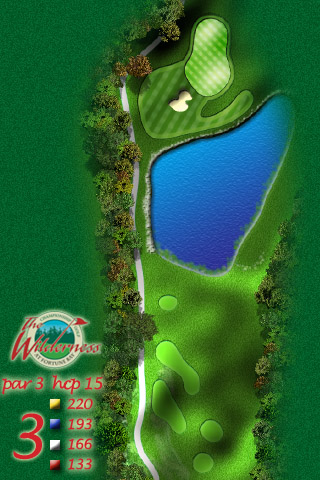
Hole #3
The Walleye
Par 3
220 / 193 / 166 / 133 YARDSThe cart path from #2 winds through a thick forest of evergreens, delivering you to the third tee. This first par three is long from the back tees, with a scenic pond located in front of the tee. This hole is adjacent to a large wetland area. Wildlife abounds here, and bird and animal sightings are common.
-
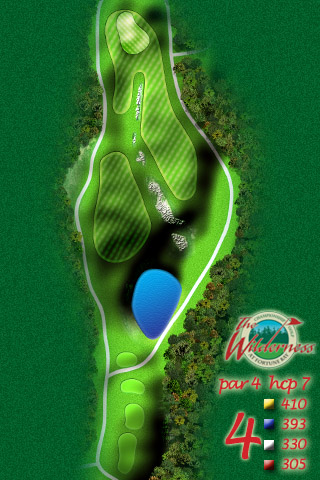
Hole #4
The Blue Heron
Par 4
410 / 393 / 330 / 305 YARDSHole #4 is a medium length par four that requires a long tee shot for success. The tees are surrounded by large pine trees, and sit atop a granite ridge. This hole features an upper and lower fairway, divided by exposed ledgerock.
-
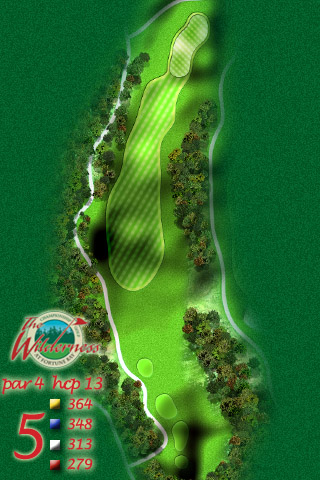
Hole #5
The Ruffed Grouse
Par 4
364 / 348 / 313 / 279 YARDSThe tees for hole #5 sit atop the highest point on the golf course. From this elevation you can see Lake Vermilion in the distance. The green features a four-foot deep swale through the middle, meaning you must end up on the correct side of it with your approach.
-
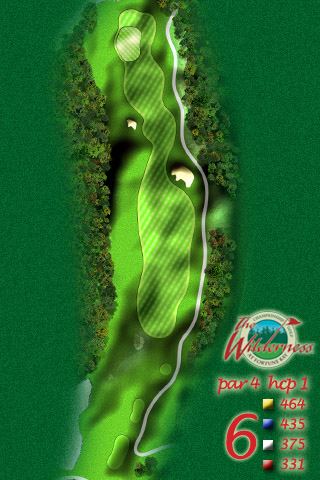
Hole #6
The Bear
Par 4
464 / 435 / 375 / 331 YARDSThe view from the tees at #6 is spectacular. From this point you can see across the eighth fairway below you, and beyond that to the large wetland and Lake Vermilion.
-
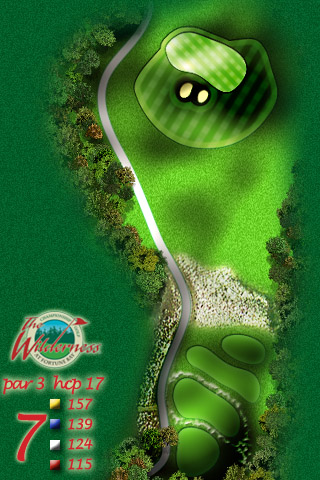
Hole #7
The Osprey
Par 3
157 / 139 / 124 / 115 YARDSThe tees for #7 are perched high above the surrounding terrain. This hole may have the most stunning views on a course abounding in spectacular vistas. The tees are 50 feet above the green, with views over a large wetland to Lake Vermilion and the hills beyond. It is not unusual to spot ospreys hunting over the wetland behind this green.
-
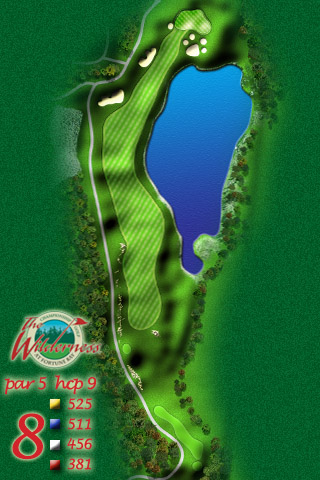
Hole #8
The Timberwolf
Par 5
525 / 511 / 456 / 381 YARDSThis is a reachable par five, with a wide inviting fairway to encourage a strong tee shot. Unique boulders sit in the fairway, but shouldn’t pose a problem for the well-placed tee shot. The fun starts on the second shot, which you may carry over a large pond and paw print bunker to the green, or choose many different spots along the fairway to lay up.
-
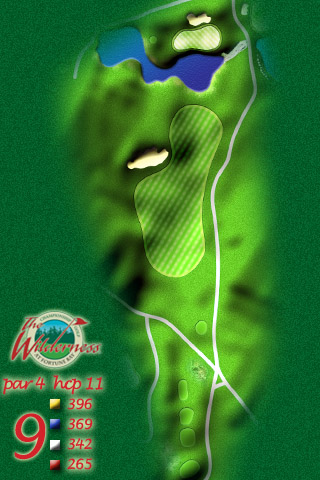
Hole #9
The Beaver
Par 4
396 / 369 / 342 / 265 YARDSThe front nine finishes with a tee shot into a beautiful valley, with a large target bunker affecting play. The green is perched just beyond a pond that must be carried to reach it. With a bunker behind the green and cascading rapids entering the pond, serenading sounds of falling water as you putt surround you.
-
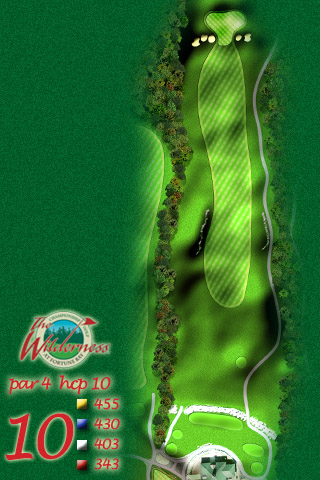
Hole #10
The Moose
Par 4
455 / 430 / 403 / 343 YARDSThe back nine starts with a strong par four featuring two sets of tees that offer completely different shot angles. On the approach, you can opt to play for the open middle of the green, or attack a flag on the outskirts of the green by challenging the bunkers.
-
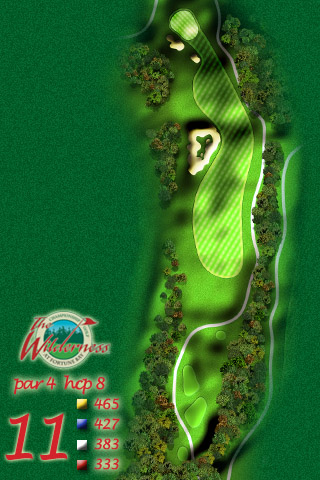
Hole #11
The Cedar
Par 4
465 / 427 / 383 / 333 YARDSThe Cedar is the second of two consecutive long par fours to open the back nine. From the tee you may catch a glimpse of the Bois Forte Heritage Center through the woods to the north.
-
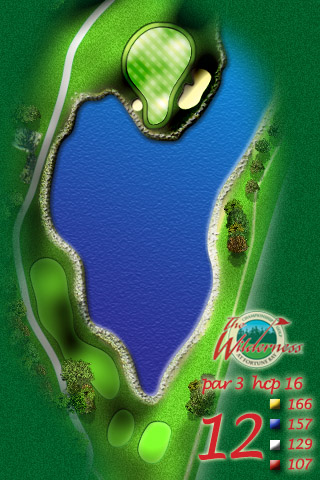
Hole #12
The Loon
Par 3
166 / 157 / 129 / 107 YARDSThis beautiful par three plays across a large and meandering pond. It features a peninsula green, with room to miss beyond the green for the timid.
-
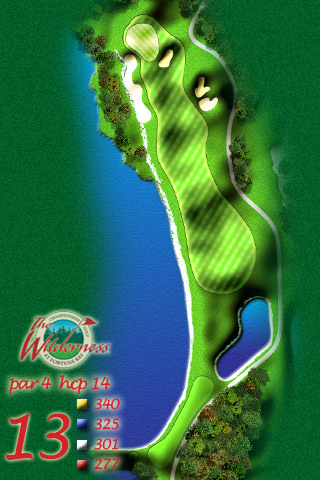
Hole #13
The Muskellunge
Par 4
340 / 325 / 301 / 277 YARDSThis is the signature hole located alongside the shores of Lake Vermillion. Sightings of ducks, loons, eagles, and ospreys are common here along the lake.
-
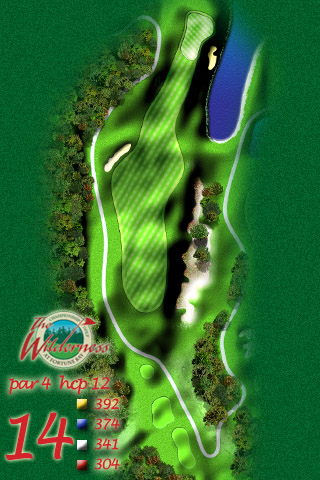
Hole #14
The Lynx
Par 4
392 / 374 / 341 / 304 YARDSA medium length par four, with a long waste bunker down the right side, offers an opposite challenge from the previous hole.This hole offers great views of Lake Vermillion.
-
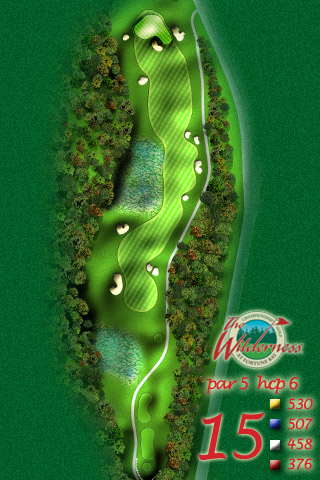
Hole #15
The Red Pine
Par 5
530 / 507 / 458 / 376 YARDSThis is the first of two consecutive par five holes. It is reachable in two, at a point in your round when that might be critical. Both sides offer some potential to bank the ball back to the center of the green. Note the massive triple-trunk red pine next to the tees.
-
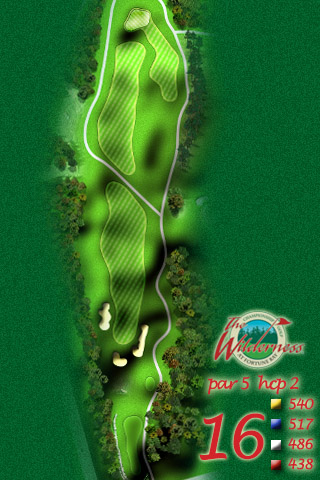
Hole #16
The Eagle
Par 5
540 / 517 / 486 / 438 YARDSThe fairway splits into an upper and lower. Play the upper above the rock outcropping to get a significant downhill “assist” in reaching the postage stamp green. The green is perched high above the surrounding terrain, and offers a spectacular view across the large pond on #8 and the wetland beyond.
-
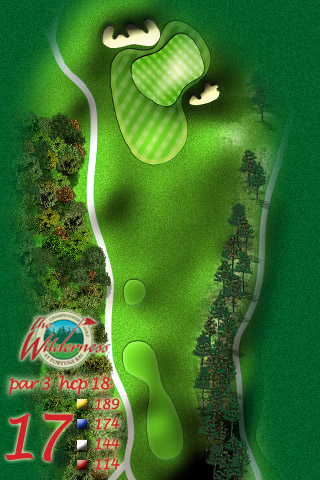
Hole #17
The Deer
Par 3
189 / 174 / 144 / 114 YARDSThe 17th is a straightforward par three offering little trouble, unless the pin is located on the back right. You must combine distance and direction, or the back bunker will come into play.
-
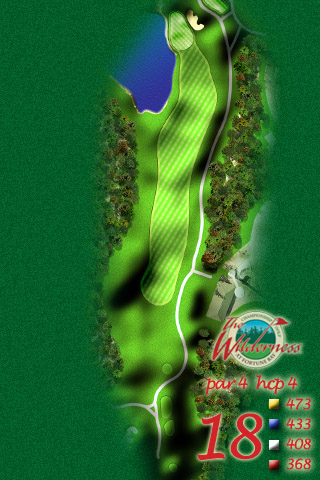
Hole #18
The Turtle
Par 4
473 / 433 / 408 / 368Number 18, is a strong finishing hole featuring the most difficult approach shot on the course. As you approach the green you will have a great view of a waterfall cascading into the pond. The clubhouse is behind and to the right of the green, so you will likely have a gallery to watch you putt out to finish your round.